Showing posts with label details. Show all posts

Wednesday, March 3, 2021

Orbital Dreams: Honda NSX-R Restoration (ContempoConcept)

On this feature from Contempo Concept, they moderately restore a Honda NSX Type-R in championship white over black. Who says "we just ordered a new oem radio and bezel" because some PO installed a double-din unit and cut up the original panels? These guys, that's who.

Video courtesy of ContempoConcept.

Wednesday, June 24, 2020

Wednesday, July 5, 2017

Automotive Workshop: Do you know what "SHINY" actual means??? (AMMONYC)

Larry sits down with Fabrizio Gagliardi, Training Manager for Rupes and PhD chemist to look at what we seek in the surface of a well detailed car. Glossiness is next to godliness? Perhaps.


Video courtesy of AMMONYC.

Monday, April 24, 2017

Orbital Dreams: How to Remove Holograms, Buffer Trails: Porsche GT3 RS (AMMONYC)

Larry schools us on fixing the negative leftovers of OEM shipping on a new car.


Video courtesy of AMMONYC.

Monday, September 9, 2013

Orbital Dreams: Car Glass: Cleaning and Polishing (DriveClean)

Larry of AMMONYC brings us another detailing special, this time focusing on the windshield glass maintenance. I got glass polish and pads from Griot's Garage almost a year ago and have yet to use them. Never thought I'd better served by using a razor before the polishing. You learn something new everyday.


Video courtesy of Drive.

Monday, August 1, 2011

The Red Coupe - Details, Details, Details Pt. 6

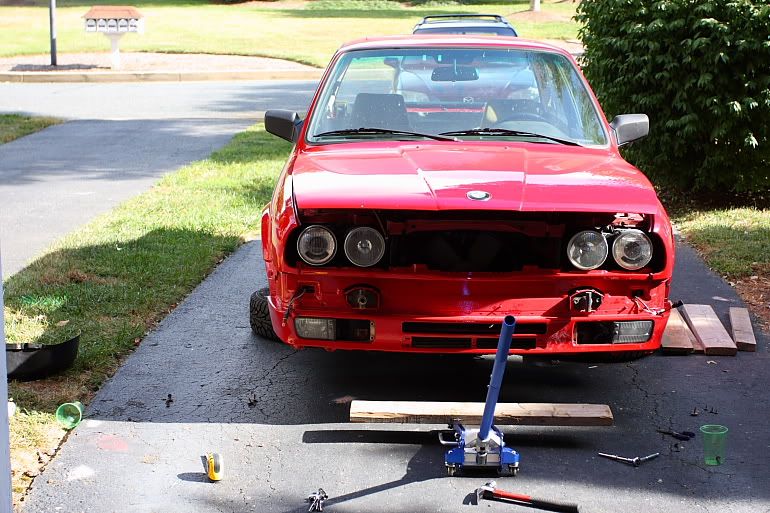
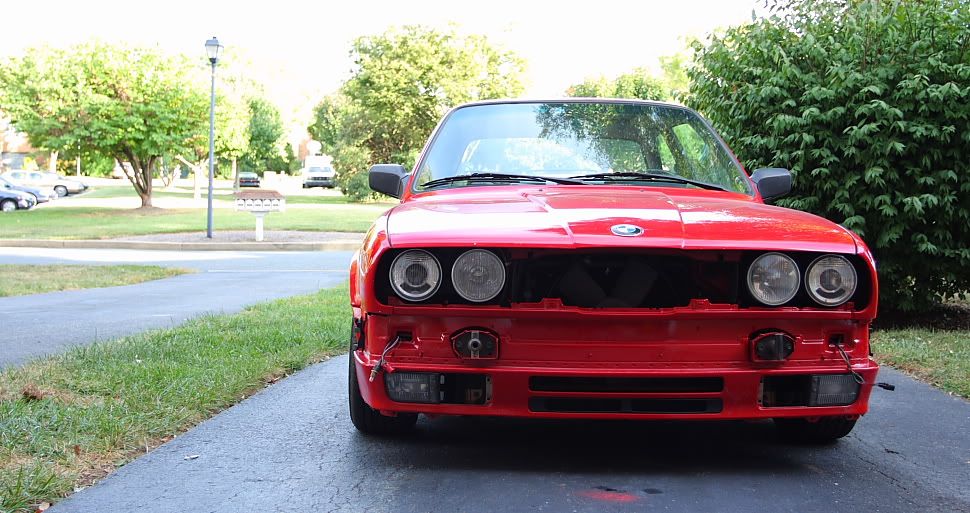
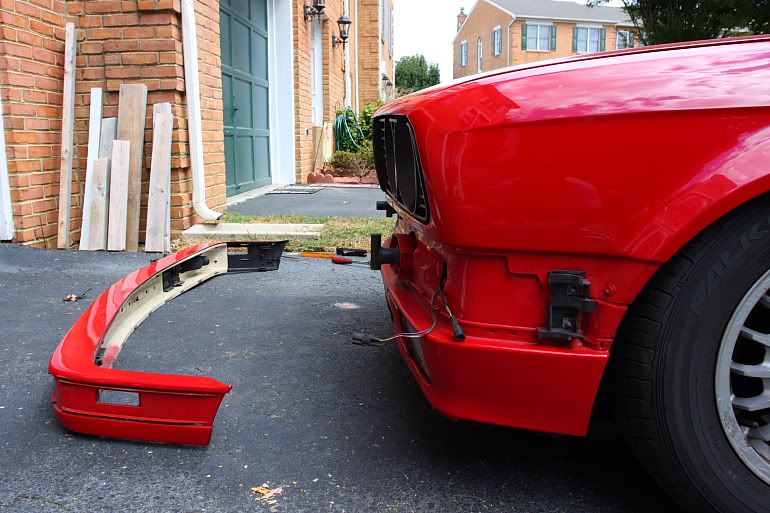
Have you ever been working on your car and got a big wiff of deja vu? Well this weekend sure delivered that aroma for me. I was replacing my front apron for the second time in two years; I really hope I don't have to go through this again. There is good news though, my experience from last time has put me on a new level of speed for performing the job. Last time around the work spread over two days. This time around I wrapped it up from kidney grill removal to reinstalling front wheels in about 4.5hrs...with breaks as the summer sun was strong.

I had been on vacation for a few weeks, but before I left I'd gotten my resprayed front apron, spare front bumper and new IS lip from my bodyguy Jason. He'd removed the texture from the replacement front apron you saw in this post, and painted everything zinnobar. This time the mix came out a bit darker than my last painted apron, which actually was a closer match to my original paint (waxed ha). Any of you who have mixed paint before know that matching red is a bitch. Learning from my previous lessons, I removed all clips and grommets prior to getting the apron painted which helped a great deal this time around.


I started off putting all the lip clips on the new apron and cleaning my spare turn signal housings; going forward I plan on using this new bumper for summer duty and my existing front bump to manage the annual grind. As such I have new turn signal lenses, new us-spec front trim and tow hook hole (I have euro trim in a box, but i like the US trim...mmm trim) for this bumper as well as new front side markers to round out the refresh. Unfortunately due to a mix up I didn't get an order of front lip clips, but those will arrive this week sometime. I had 4 stashed from last year so I put them into the areas hardest to get to once the apron is installed.


One thing I did forget was getting green grommets for the ducts and oil cooler vent, but I found out again for the first time that you can gently remove them and get more than one use out of them. The same goes for the push tabs that the foglights screw into. I had my original apron in the garage so I salvaged that for some parts and the rest I got from my current apron after removal. Spares are a wonderful thing, if you have the room. Learning from last year, I did all my apron work inside the house in lovely air conditioning. I also put the turn signals and lenses, fully assembled, on the bumper from the inside (doing it from the outside leads to...paint scratching) and after those were on installed the bumper trim. I learned something about this new bumper right after buying it; it was true as an arrow. This made the trim installation happen without a rubber mallet like last time.


Once the apron and front bumper were as complete as they could be (the ducts would have to come off for the lower two attachment points), I got the car up on some handy car jacks and got to work. After the inner wheel well duct panels are removed, there are 14 screws and some clips that keep a harness bundle from swinging into the auxiliary fan...that's it.


When installing everything I learned that I need a new kidney grill, because the impact of the raccoon at 70mph not only broke the filaments in both foglight bulbs and bent the inner apron mounting framework like a cheap spoon, but it also broke the lower clip fingers on the kidney grill. I remedied this development with a zip tie until I get my next order of parts in. The second interesting thing I learned was that the contour of this new apron is slightly off on the driver side, by about a centimeter or so, so attaching the new inner driver-side brake duct panel took some improvisation. All in all, the new aprons fitment visually is better than the last time around. It's times like this when I consider garaging the car.


I threw a coat of matte black paint on my spare oil cooler vent and installed it after the pic above. Now all I need is the lip clips...and a new bulb socket for my driver-side sidemarker, because I currently have to wiggle the bulb just right to get it to light up. In the meantime no lip means I can pull onto my driveway without wood planks as long as I take a good angle. After a two hour break watching X-Games, I spent the night washing the last two months of grime off both this and the grey hatch. Next on the list of to-do's is the odometer that took a crap a few weeks back.

Monday, October 25, 2010

For the love of P. #4 - Singer Porsche

The ultimate Porsche.

Whether you pronounce it with one syllable or two, your favorite car has been an early 911 with a hotted up motor. It's gotta be one of those bright colors, not quite psychedelic, but certainly eye catching and classic. "Ach!" I hear you exclaim, "but what of reliability?". Of course. Every nut and bolt, every piece of rubber, of metal and fibre remade, reformed, or replaced. "Ach Lieber! But what of the performance!" How about modern brakes, modern tires and sizes, but all in a classic mold? Well, they've gone and done it.


Singer Vehicle Design has brought a classic shape into the modern world. Nearly every panel has been reworked with carbon fiber, or retrofitted with modern verisons of relatively ancient technology, all in the name of Porsche. Just look at this frontend! Projectors retrofitted into original glass from the 70's, and look at the trick way those foglights were integrated into the marker lights next to the turn signal. The attention to detail is unbelievable.

"Restored, Reimagined, Reborn"

I'd say they nailed it.

Check out founder Rob Dickinson's interview on Adam Carollas "Carcast". It's a great podcast for automotive enthusiasts, and he's got a bit of a softspot for the euro crowd.

See more pictures here and here

Wednesday, September 22, 2010

The Red Coupe - Details, Details, Details Pt. 5

Well this is going to be light on pictures as I was too busy toiling in the sun to shoot as I went the past few days. I got all my parts in from blunttech, installed my new driver fender liner and plastic nuts for the inner fender studs on both sides to protect my tires. I also swung by Performance Collision to get my custom painted 'is' rear spoiler and zinnobar front bumper. I also got my car back from Euromotive with my 3.25LSD, new guibo and center driveshaft bushing installed.


To address the differences between the 3.25LSD compared to a 4.10LSD, from my short seat time, gearing is lengthened considerably putting 60mph in 5th around 2200rpm. I can also get to ~62mph in second gear, which is...satisfying. Gearing is noticeably longer, but the torque still gets the job done; I compare gear length mildly to driving a VW Mk3 5 speed. I'll get a better feel after the drive down to Ocean City this coming Friday. This differential, from an e28 535is, was silky as advertised; it turned out to be one of my better purchases (albeit somewhat incompletely informed at the time I did so). The guibo and center driveshaft bushing definitely needed to be changed, because now I don't have drivetrain clunk during reverse or when going over large bumps (like my driveway). Hopefully the 4.10LSD can be repaired at some point, but it's no longer a current concern.

The disappointing news is my front rad support is in fact bent which is why the coolant hose, that was recently replaced, was punctured by the fan after this happened. When using my hand to measure the gap between the top hose and the clutch fan, on my car vs. my buddy Ethan's e30, he had approximately 1" more room. Accordingly, while installing the new front bumper was smooth and easy, there is still a small gap behind between the front bumper and the front apron. I'll have to figure out whether it's worth having this pulled when I finally have the car resprayed (if that turns out to be the plan). The bumper also is slightly warped, in a way only a stickler for detail could notice, but it's far from a problem visually. On this new bumper, I installed my new front trim as well as front turn lenses. I also installed my newly delivered grommets and brake ducts to the front apron.

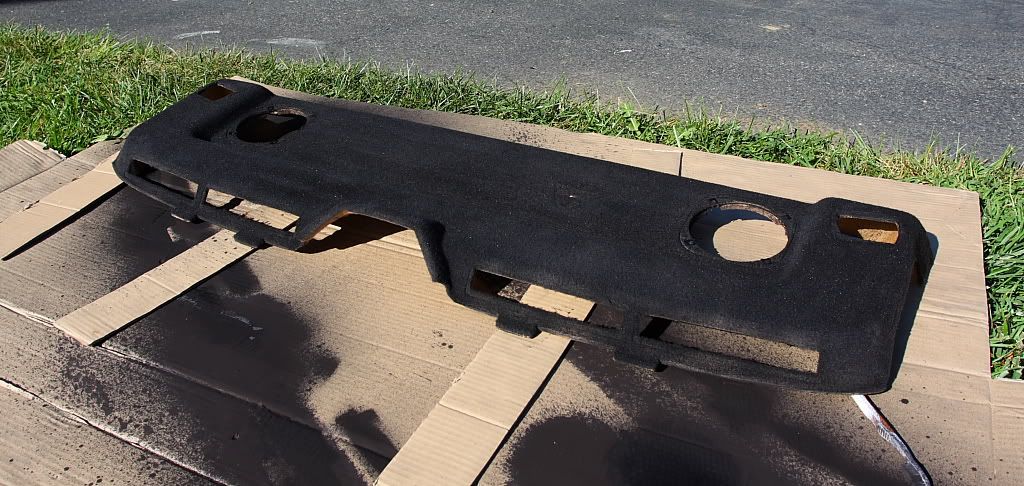
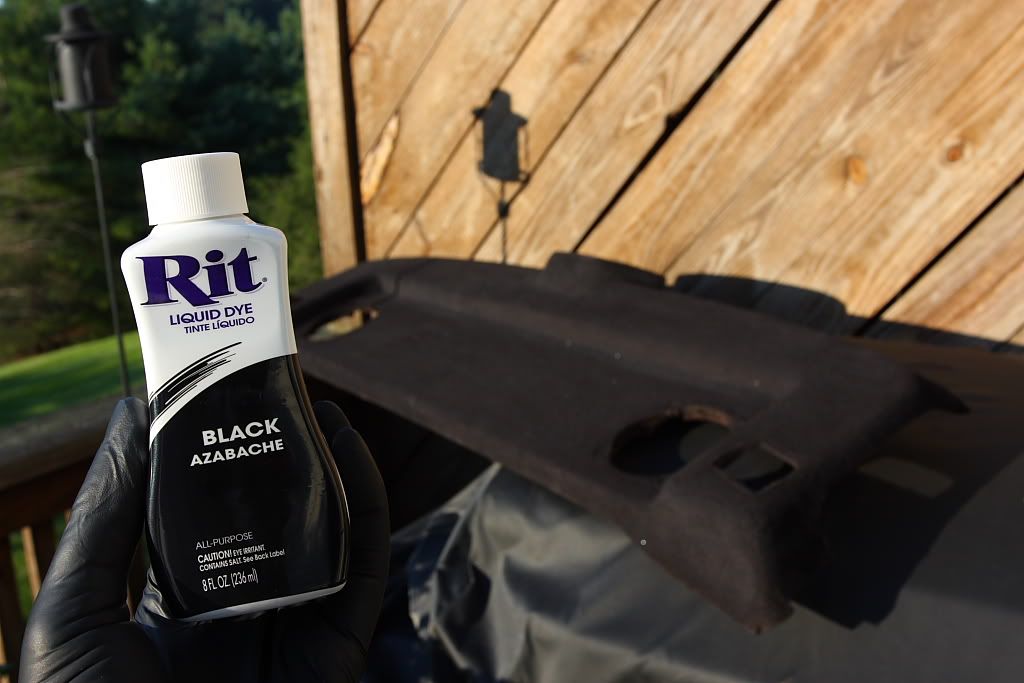
Lastly I washed it thoroughly and cleaned the interior/windows. I was going to do some touch up painting in a few spots, but the paint pen I got was disappointing to say the least, so I'll pass until I get a better applicator. Unfortunately I got some waterspots on this non-cleared paintjob that are being a pain to remove, after eight gd months of it being outside, but what else about this project has gone according to plan. Oh and I installed my dyed rear parcel shelf as well this weekend; I suggest to anyone doing this to use a dye fit for synthetic fibers (RIT is made for natural fibers). While it's definitely nice enough for what I intended, the dye hasn't absorbed into the fabric as much as it has laying on the surface. Regardless of it being dusty to the touch, if you do touch it, it looks solid installed with all the cleaned up breather ducts and speaker covers/screws.


Welp, there's plenty left to do for this red coupe, but this end of the season chapter push is now over; I'm just about done looking at it for a few months ha. I've spent more hours on this car over the past 6 weeks than I care to recount; hopefully it'll all be well worth it. I haven't really driven it in two weeks so I'll know when I do. A few surprises of my show setup will be left to be seen in person. See yall at H2oi.

Thursday, September 16, 2010

The Red Coupe - Details, Details, Details Pt. 4

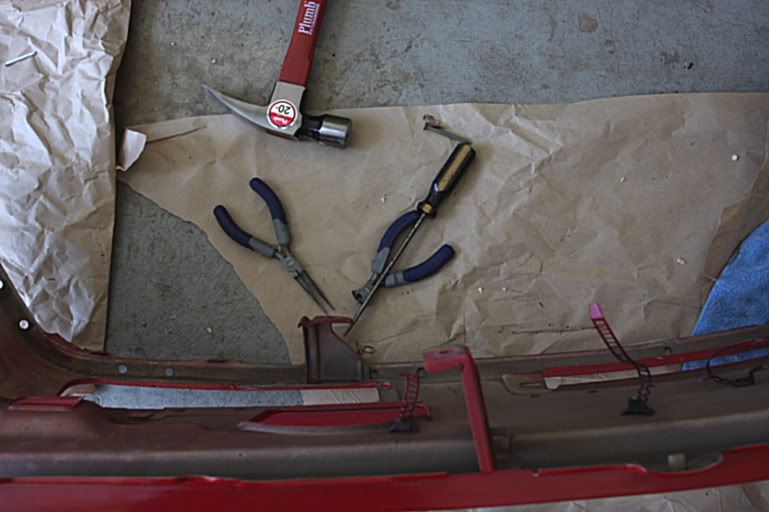
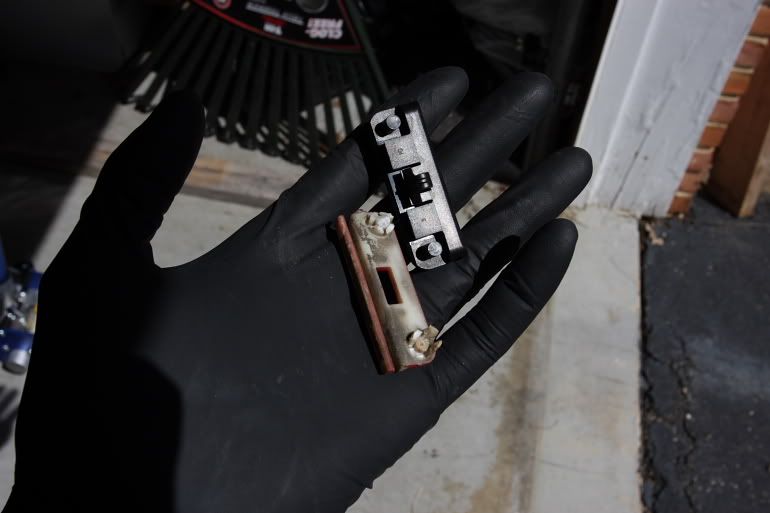
What I underestimated most concerning the apron swap was getting the replacement apron prepped and ready to install on the car. I took my one good foglight from the original apron, grabbed my spare used fog and cleaned them both up; I sanded off the over spray on the rubber seal and took some stoner cleaner to the lenses. Then I went to install them and everything was bent just enough to make things interesting. I busted out my pliers and started bending metal into shape; it suddenly became clear why my fogs fit so poorly on my original apron. While I was at it I started bending other sections that I saw were slightly deformed from the opposite sides. Then I noticed most of the clips for the front spoiler had broken tabs or were missing entirely...sum umma bitch (RIP Bernie Mac). Fortunately I was prepared for this, cause' through my obsessive small-parts ordering sprees this past spring while I still had money, I bought ten replacement clips through getbmwparts.com. Easy fix right? Wrong. Getting the old clips out was a game of trial and error to find the best technique...but I eventually settled on two depending on clip placement; 1) Hammering a large screw put on the pin that needed to be pushed back out after breaking surrounding pieces off with needle-nose pliers 2) Turning the hammer backwards and using the prying side to bang the pins and everything else attached out the hole.


Banging on a freshly painted body panel isn't for the squeamish. Thankfully everywhere that got dinged or nicked was on the backside or would be covered up by some 'vehicle trim' once everything was back together. I should have done these repairs before paint, but live and learn. Now that everything on the apron was good to go, I could line it up for installation.


Sliding the apron into place was a tricky proposition until I used my noggin and grabbed the car jack and some wood. I made sure to semi-tighten a couple screws on opposite sides until I had the majority of the attachment points lined up good. I ended up having to do a little more metal massaging and maneuvering to get things just right, especially where the fenders curl into the apron metal beneath the headlights. 


I put all the screws back where they came from after securing the lighting harness and plugging in the foglights. Then I tightened them all randomly until everything lined up just right, including the bumper guides. I then did a temporary 'couple of bolts' installation of my inner fender liner and duct panel on the passenger-side so I could get back to the bumper guides later.


I still need my new driver-side liner (ordered) so I just mocked up the driver-side brake duct panel in the same manner. A sigh of relief came when the wheels were back on and I could get off my temporary jack stands. It's now ready to go into the shop for service.


It'll be getting a new guibo and center driveshaft bushing installed along with my lower mileage GutenParts acquired 3.25LSD that's been sitting in my garage since February. All of these changes should help with the racket I currently hear backing up, among others, during slow speed driving. I'm also looking forward to seeing the difference between this and my peppy 4.10LSD for daily driving usage as well as mpg. I hope I don't miss the short gearing too much; chirpin' second is fun.

Wednesday, September 15, 2010

The Red Coupe - Details, Details, Details Pt. 3

Next on the list of things to repair was the front apron. While surprisingly photogenic while completely together, the front end has been bothering me for a long time. The fact that this car was backed into while parked made me ponder the structure of the front framework to which the radiator is attached; mainly because until now I didn't know what was 'normal' for e30s. Particular to the design of (this) BMW is a welded rad support and I didn't want to have to get anything pulled back into shape (already got quotes for this work). I resigned myself to taking everything apart and then seeing what was what (it's free.99 this way).

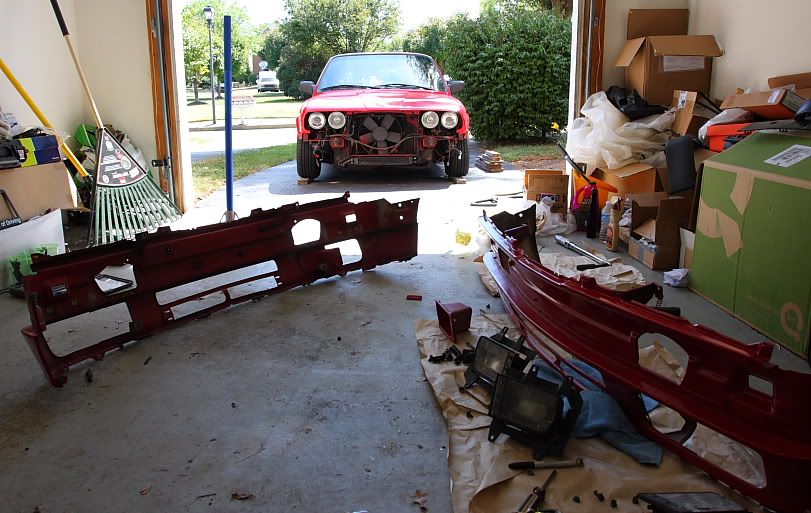
I got online in advance to get some ideas of what was ahead for front apron/valance removal and it didn't seem to be too much an issue, tool-wise, just something that would take some time. Thankfully I didn't try forcing it into my last weekend thrash, because it took me two afternoons to get everything together; so lets begin with the front bumper which needed to come off. As I stated before, I wanted to get the front bumper resprayed to compliment everything else new I acquired for the front end...lenses, trim, apron, etc. So on Friday, I got up early to get it removed so I could drop it off with Jason.


Removing the bumper was relatively painless, but if you plan on doing so I suggest you watch your fingers around the bumper guides. The only tool I needed required a quick trip up the block to AutoZone; a T-55 Torx bit and a 3/8"-1/2" adaptor for my ratchet (they didn't have 1/2" drive T-55s). I was going to remove the backing from the bumper also, but I decided against wasting borrowed time and being in need of more one-use clips and what-not to put it back together later. The most important thing about having the front bumper off was trying to determine what made the bumper not quite line up perfectly on the pass side.


Thoroughly looking everything over showed that there were no bends to the front bumper shocks or rad support, but I apparently misunderstood what the PO told me at the sale; I thought he said the hood was an aftermarket unit, but what he actually meant was the passenger fender was. I could immediately see the stamping wasn't the same on either side, and due to how the bolt holes line up for the attachment of the front apron and bumper guide, it's easy to see how the bumper would not only have a height difference on either side, but improper alignment. Good thing to know going forward.

After dropping off the bumper and returning home, I made quick work of unscrewing everything holding the front apron on. I made sure to disconnect the foglight cables and all the beat-up fender liner/brake duct trim as well. I really need to get a few car jack stands for the house, but I got creative in the interim. While everything was apart I made sure to take pics of the position of everything in case I needed reference later on. The old apron was now removed so I started removing reusable parts and prepping my pretty painted replacement apron which was waiting in the wings.


The next problem was that I over looked a few things on the replacement apron when I bought it; it was in bad need of some of those little green grommets that attach the oil-cooler cover piece as well as the brake ducts. I also needed some screws and clips needed to attach my new inner fender duct panels. My left-right misunderstanding reared it's head again as the fender liner I got was for the pass-side, not the driver-side (even#-passenger/odd#-driver). Of course both were trashed so I did need to replace both, but gd the nickle and dimin'. I feel another parts order comin' on.

Wednesday, September 8, 2010

The Red Coupe - Details, Details, Details Pt. 2

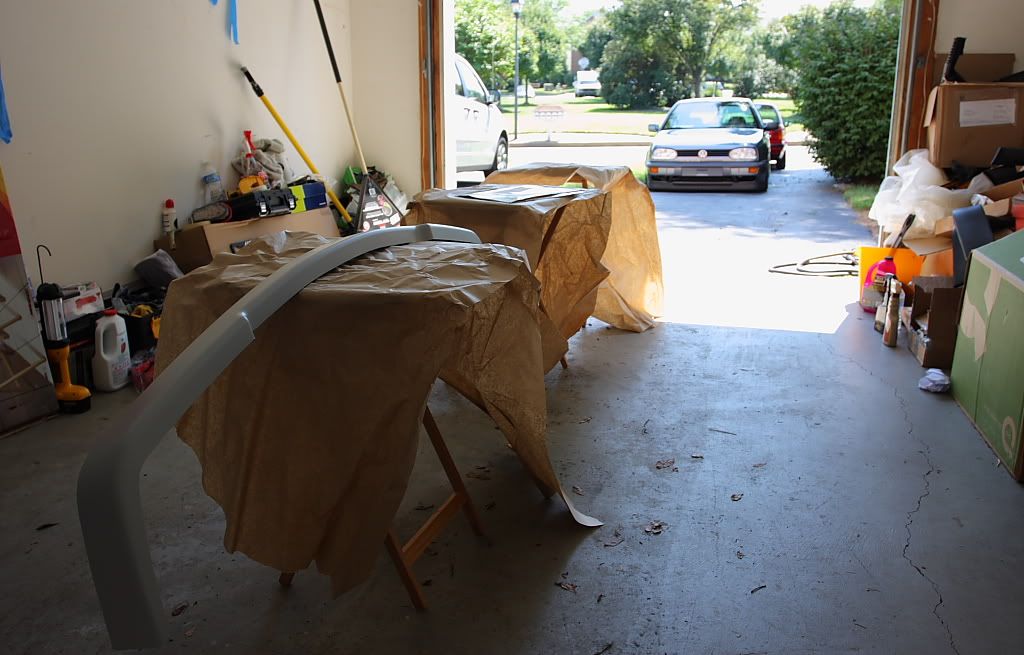
Welcome to my paint booth...the garage of doom.


One thing I love to do for my projects is have a variety of parts options to switch up the look on a whim. As you can see, I got a second 'is' lip (since they're so cheap right now - thanks Blunttech) to paint satin black for daily driving duties. The color matched one will be more for warm weather usage. The great thing about this factory lip is that it comes primer coated already, so i got right down to business with the light initial coats to get the party started. I was a few passes in before I decided to cover my face ha.

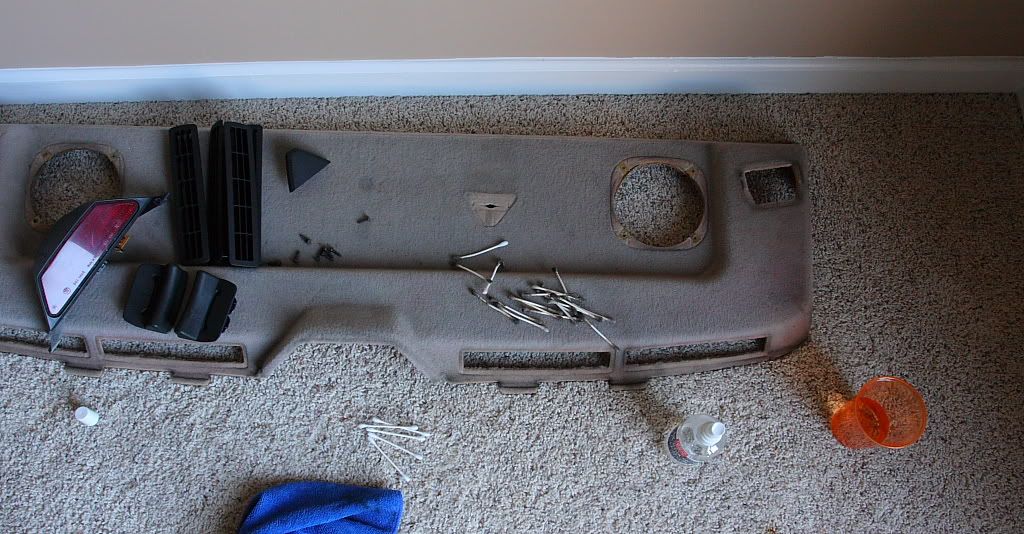
While I put layers on the front lip every 15-30 minutes I was heating up water on the kettle to mix with my dye for the spray bottle. The box my lip came in helped me not make a complete mess of the garage floor. I made one solid soaking pass of dye on the parcel shelf, then set it up in the sun so it could dry before the next. I could see getting rid of the tan would take some work, but I was prepared to run without a rear seat and speakers for as long as it took to get it to look good.


After about three coats it was looking pretty good. After looking at it dry the following day, however, it appeared my desired result would need another pass or two. Thankfully the weather has been hot and sunny; it got plenty opportunity to bake the color in.

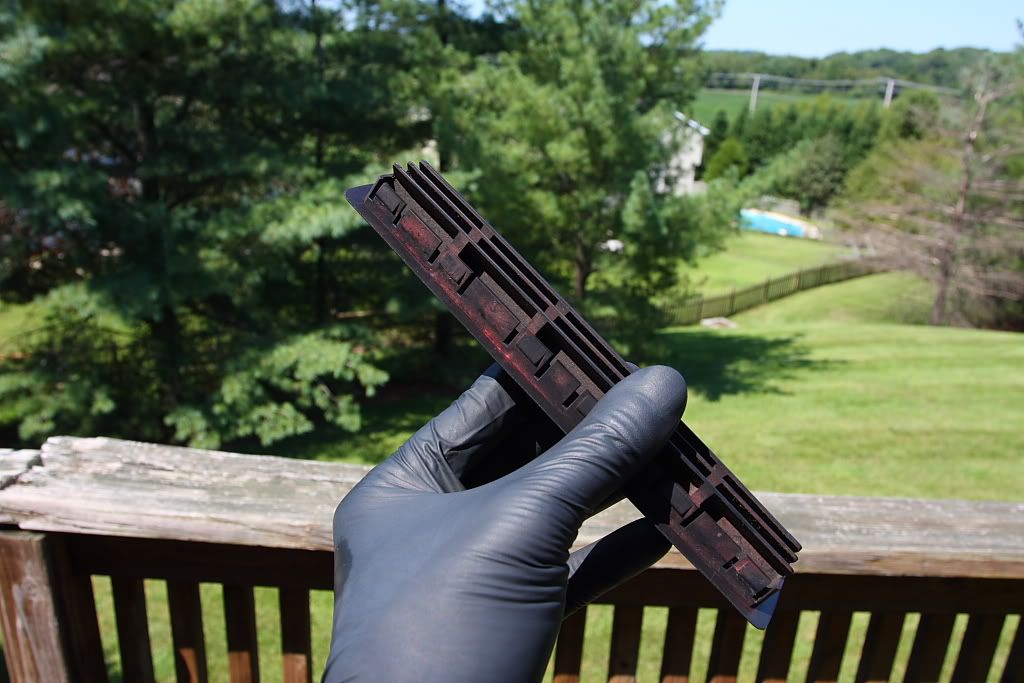
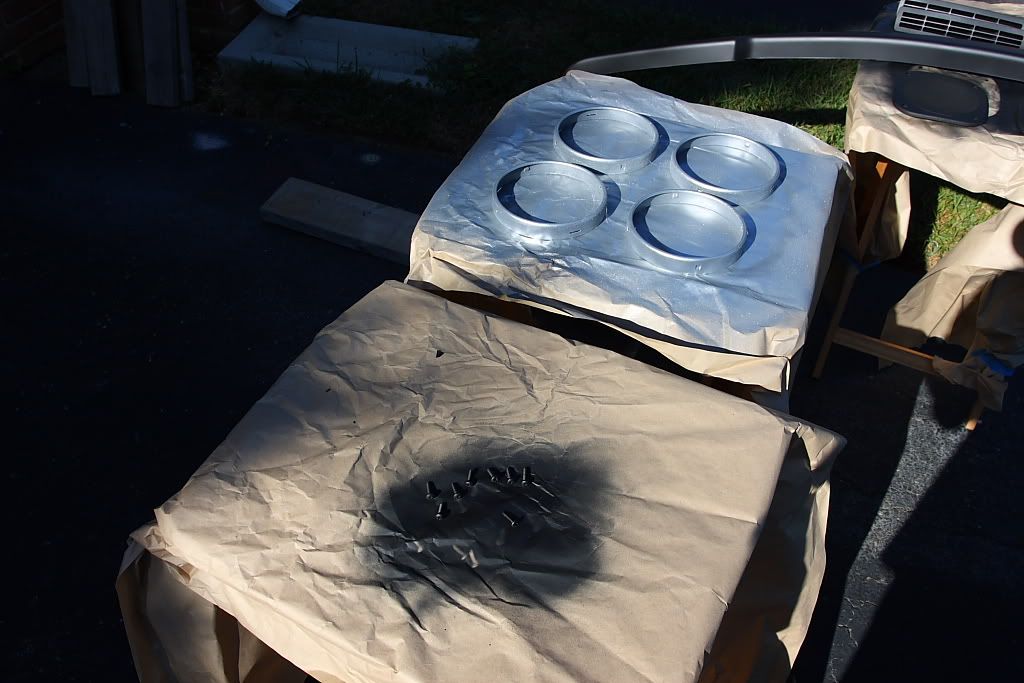
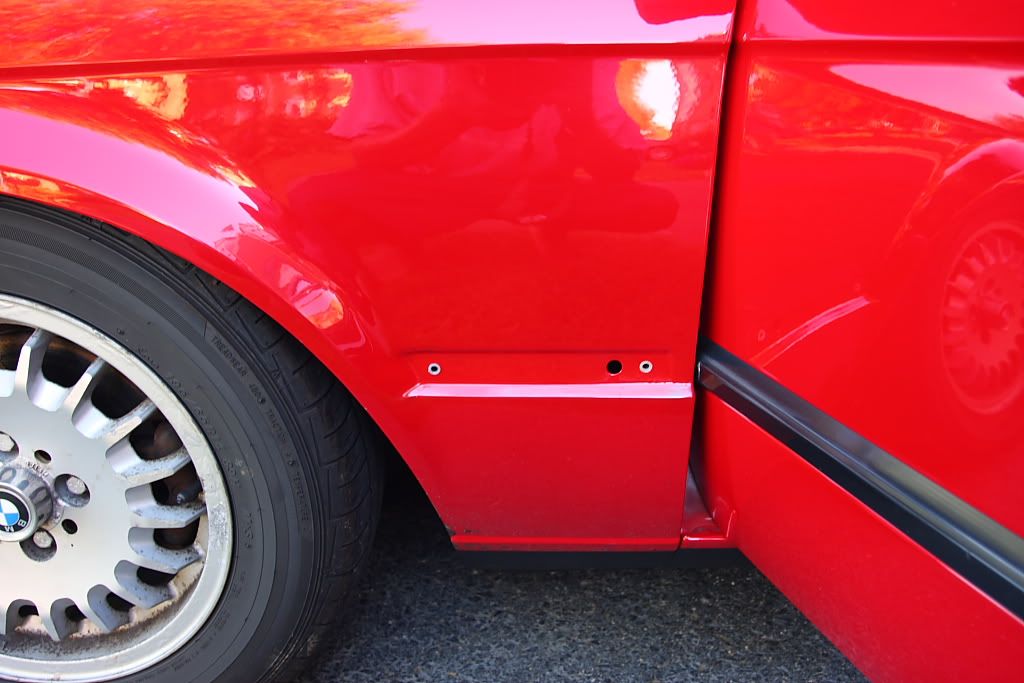
Before the dye job got started I had to clean all the parts of the parcel shelf; trunk vents, speaker covers, screws for the speaker covers. I cleaned up everything with window cleaner and a microfiber towel and took Q-tips to the vents for added clean detail; warm water in a cup to rinse the solvent away. I then took a little satin black to em to get them good and dark again. It's the little things that go the furthest. While I was at it, I sanded the screws down and sprayed them with matte black Rustoleum. I did the same thing for the rusty grill and door handle screws afterward.


For the doorhandles I ended up using 'Back to Black' restorer instead of paint, but I think I'll be using paint after this wears off...maybe sooner. I don't like shine much, but it is a good product...you just have to buff the hell out of it to tone the gloss down. The next thing on the list was the headlight rings. The PO painted em black, but that was all chipped to sht from years of neglect. I threw some 120 grit at em' and coated them with Rustoleum primer. I wanted a bit lighter of a final color so I drove 300 yards over to the new Autozone they just opened around the corner (thank god, the next closest auto store is about 20 miles away) and picked up a can of GM silver metallic; it was the lightest silver they had. It looked like a NASA space suit from the first trip to the moon at first, but once installed looked just how I wanted it to.


I had some drankin' to do with friends Saturday evening so Sunday afternoon, hung over, I put back the front bumper trim I had taken off, hoping to swap front aprons on Friday, back on. I got it on pretty good compared to what it was; all the broken trip clips were mainly to blame for that (new front trim on the way thanks to blunttech). Then I did a rushed aka half-assed job putting on my driver-side door handle and drove to work, hot, sweaty, salty and a little dizzy to be honest ha. That August sun sneaks up on ya. Anyways I put another good coat of dye on the parcel shelf before leaving and put it back on the gangsta grill for the lady to take off after sunset. The front apron swap will have to wait for another day.

Tuesday, September 7, 2010

The Red Coupe - Details, Details, Details Pt. 1

I finally got the weekend time free (and more importantly the weather) I needed to put in some major work on some of the small nagging things I needed to clean up on the car. Of course I have a few more things in need of paint, but in the meantime between time, I had everything I needed to get some major chores checked off. This was the mini to-do list I whipped up for myself for the weekend:

  • remove front bumper to see what's making my car smirk
  • remove front apron after trying to get things to line up better and swap in replacement
  • remove rear parcel shelf and dye it black
  • align metal trim on driver side door
  • touch up the black trim (mhmm) and paint chips
  • replace antenna
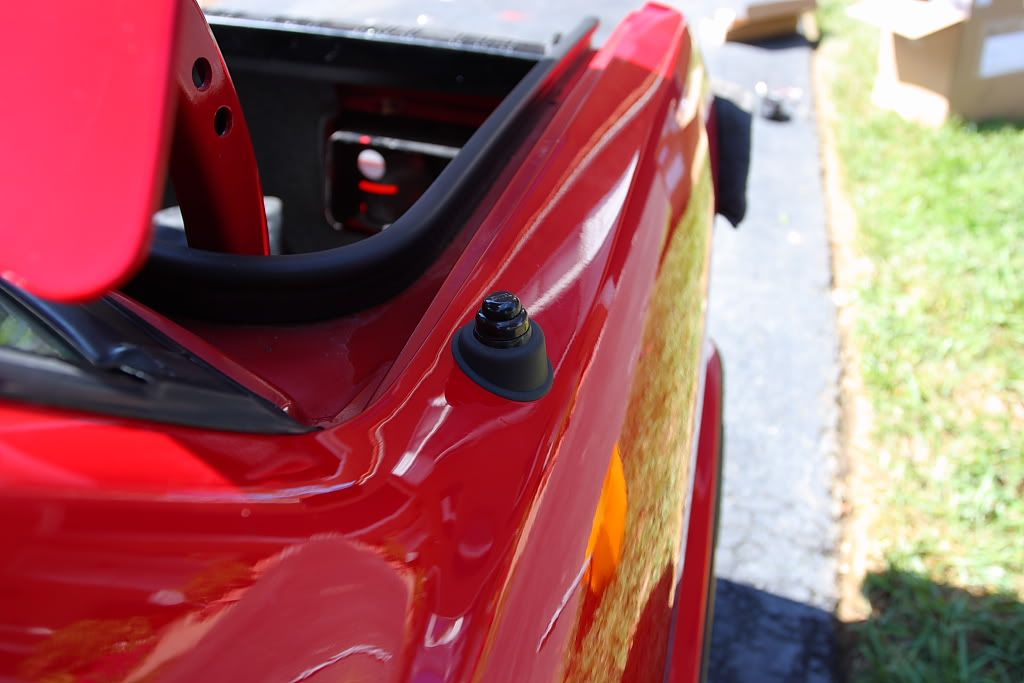
So two Fridays ago I woke up early at 11am (relative ha) and got a thorough car wash in before I got to anything else. I had a couple weeks of bullshit on the car from when i got it back; grass clippings from the hired help in my complex, road debris, tar, dead bugs...you get the idea. While washing, I decided to finally remove the doublesided taped on front fender moulding and remove all the adhesive holding it on. While that was a good thing, I realized quickly the moulding I ordered to replace it was for the wrong side; what kills me is that if there's a right and a left, is it right and left looking at the car from the front or the vantage point from the drivers seat? Turns out it's the latter, thus for the passenger side...ugh. I dropped Steve from Blunttech a line to get a quick resolution and got back to business.


Upon wrapping up the wash I rolled right into installing the new power antenna I purchased the week before. My antenna has been a pain in my ass since I bought the car; the stars would have to align just right for it to go up and all the way back down when I turned the radio off. Rather than swap in a fixed mast which would have been perfectly fine, I wanted things to be as close to original as possible and an antenna that went up and down was a big thing for cars of this vintage.There were three options for replacements, all of which were a relatively small amount (for something that would be there working properly for the next 5+ years): (1) replacing just the mast (2) for 15 bucks more just getting exact same complete power antenna unit already in the car or (3) getting the self adjusting power antenna upgrade Hirschmann made for the e30, for another 90. I decided to splurge and get the best of the options #3, but got it for ~40 bucks less than everywhere else via Partsgeek.

The installation was pretty straightforward, I just had to modify the support bracket with some elbow grease to get the right angle. For all the shadowline-ing done to this car since acquiring it, this was especially pleasing.
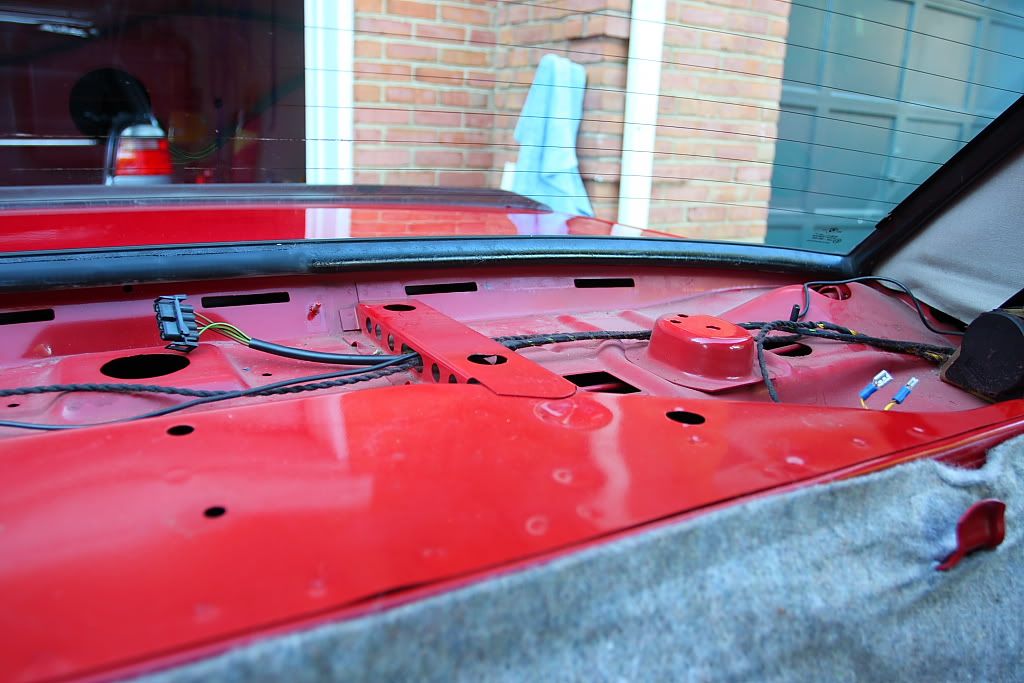

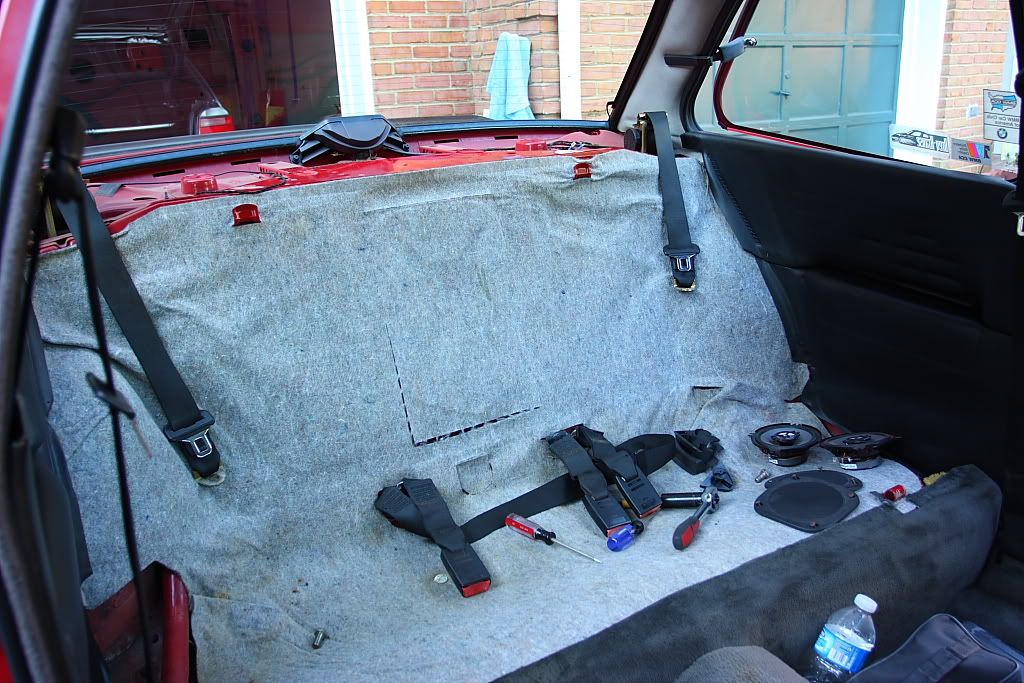
Since I wouldn't be able to get to everything I wanted to accomplish on Friday, I tried my best to set myself up for Saturday which would be paint day. The sun was dropping fast after all the cleaning was done, so I made sure to at least take my back seat apart so I could not only add some missing hardware upon re-install but more importantly get my parcel shelf out for the dye job.


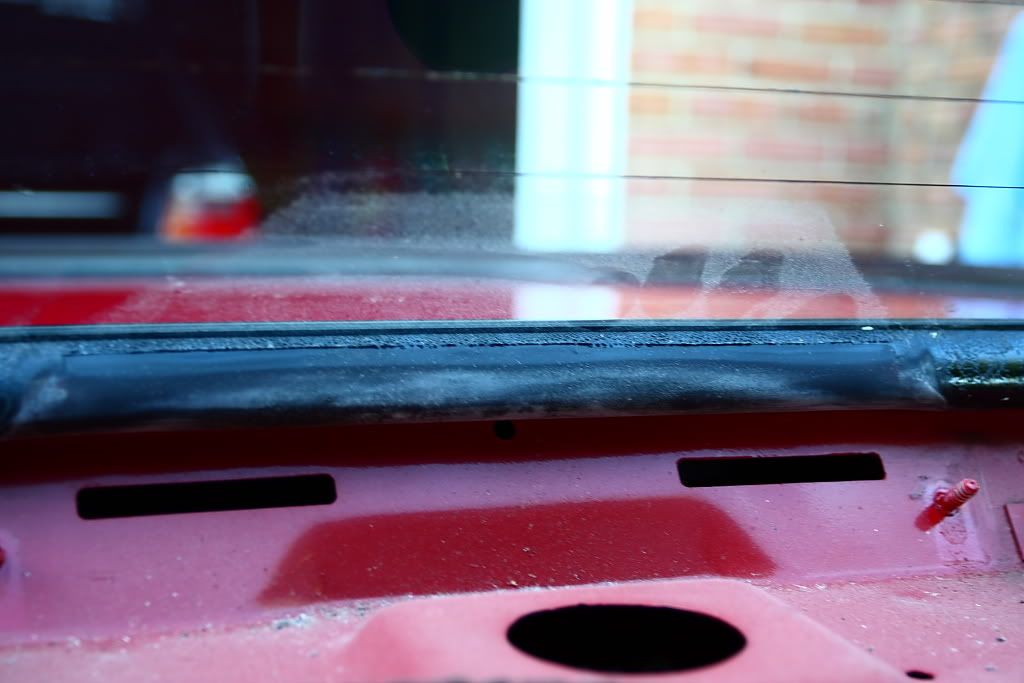
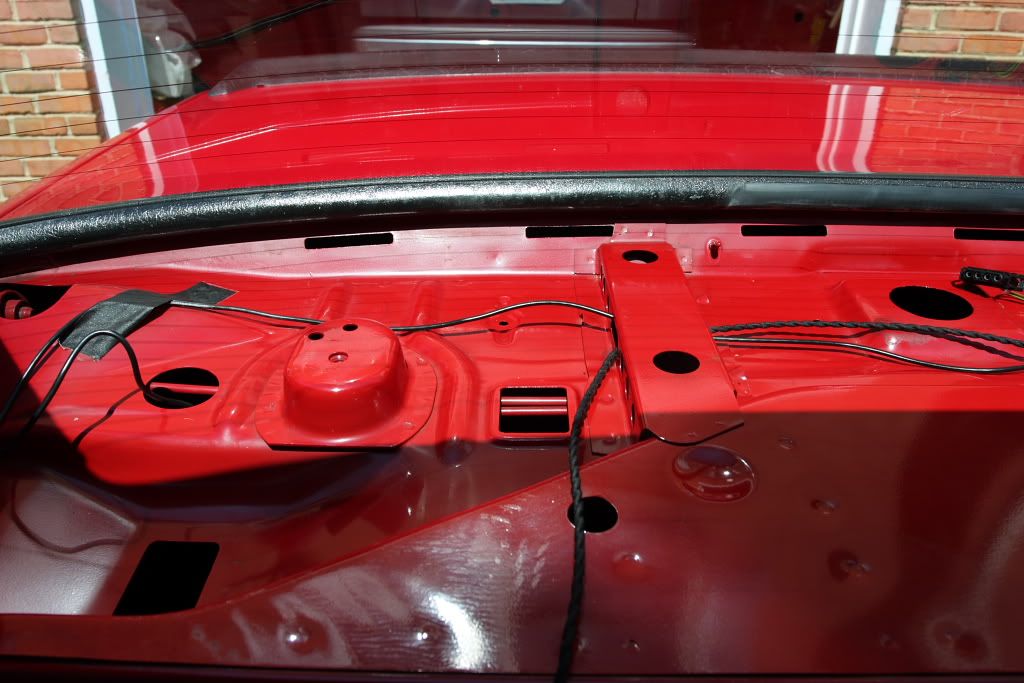
More an more evidence of the previous paint job rears it's ugly head as I took everything apart. Even more interesting is that I found uncut raw diamonds in a some crevices on the passenger side crease under the doorcard! Well actually it was bits of shattered glass. This car has definitely had an interesting past. The greatest thing of all this removing of the parcel shelf did for me wasn't a history on the car, rather it was the access it gave me to clean some odd spots I could never get to previously.


Oh so sweet it was, taking a cleaner dampened microfiber towel to all the old paint residue and the fingerprint marks that have taunted me for months. A great relief for the ocd bug inside me. The metal under the parcel shelf was filthy so I took the time to clean this as well (I'll double down with adhesive remover later). Dog hair and lint in abundance.


Now I have a clean slate on another portion of the car. Awesome. Now I just need to rig up a paint booth...