Showing posts with label grease. Show all posts
Wednesday, May 11, 2011
The Red Coupe - More Power Pt.4
The next day was a hot one. I got back to the shop the following Saturday to put a solid five hours in before returning home for a much needed night out with the wife. This was a small break in the middle of money spending and daily lack of sleep. I spent the whole week researching solutions to multiple future scenarios regarding this engine exchange, as well as possible management problems, etc. Since this engine is both higher in compression (~9.5:1 vs 8.8:1) and larger in displacement (+ .3 liters) I was concerned with leaning out high in the rpm band to redline, as is known to happen. The opposite problem would be being pig rich with the 19lb injectors, with the ECU thinking they're 14lb, so the prior all-stock solution was the plan we'd go with for the sake of reliability. I didn't want to get the car running to be put on ice again and I didn't want to buy a 'temporary solution' chip right now, because I have a plan for management down the road.
After yesterday's motor install the car was sitting with a long block/trans installed with no intake manifold, accessories or coolant hoses attached. The wiring harness wasn't installed either, and that seemed like it would turn into the biggest pain in the ass so I took that on first. Before that though, I did some odd cleaning of debris in the bay and did some logistical analysis on where all the coolant hoses that were left were supposed to go; some of them would be skipped anyways as the intake manifold/tb wouldn't be installed.
Once the logistics were sound, I started putting things back to where they were supposed to be. This was tricky because I didn't want to go too far in some areas, because Tim would just be taking it all back off again the following day. I got the engine harness mocked up and went about snapping the harness seal into the firewall and connected to the ECU; a large flat head screwdriver and a shop rag worked wonders. Things were going good until I saw a connector in the glovebox that didn't have a wire to plug into it; I then spent 40 minutes searching the web in the back seat (thank you EZtether app) and found out why there wasn't a plug; the harnesses between early (87') and late (89+) cars were just about the same, but certain functions were managed through the ECU so the missing plug was fine. In the rush of removing the harness over a week ago, I didn't remember what was there by default. This was one of many lessons learned during this swap that I'll take with me. I got the glovebox buttoned up after some trial and error and continued the mock up in the engine bay.
When the smoke cleared, this (above) is where I left off. I poured break-in oil (blue) over the valvetrain so that would be nice and lubed for the first start up and I left the rest to Tim when he was able to get to in the following day. I can't really detail his side of things, but he spent ~20 hours between Sunday and Monday to get things together; getting the shift linkage hooked back up, bolting in the engine mounts, getting the accessories back on, routing coolant lines and sorting out the intake manifold/connections. I showed up late Monday night after work to give him a hand to button the finals up so we could at least get an engine crank; but when the key turned we got nothing. We thought the starter was bad at the time, but fast forward to last Wednesday, it turns out I didn't bolt the ground strap to the block tight enough and it loosened during transit...guh. What do I mean by transit you ask? After the final push to get things together during Monday's twilight hours we were stuck with a starter that didn't spin. Since there was about 5% left and Tim was beyond burnt out (ditto), I had Euromotive diagnose the starter problem and do a coolant flush (that we didn't get to do) while I ran about town in a Kia Forte (thanks again Nick). Transit was by flatbed, an all too familiar sight over the years; AAA+ comes through like no other.
Fast forward to this past Friday afternoon. I had a dentist appointment at 1pm in Havre De Grace. I went from there to the Wendy's for a #1 combo with water in Forrest Hill, to Euromotive to eat while watching a terrible Western in the waiting room. I came early that day to see if any help was needed to clean up an exhaust leak that reared it's head due to a small piece of metal that came off the original intake manifold (how I couldn't remember), but they were already done. The car was run, cycled, driven and topped off with coolant. I spent the rest of the afternoon shootin' the sht with the guys before leaving with my Kia to return later to retrieve the car. The ~6 mile drive home that night was odd; I had kind of forgotten how high the clutch engaged from a stop and the stereo and clock needed resetting...but the sound was right and I realized how much I missed being behind the wheel.
This past Saturday, I finally got a chance to clean the car up a bit. I woke up after 6 hours of sleep for some reason, even though I was dead tired the night before. I haven't had this kind of feeling in a long time; a X-mas day anxious feeling. I spent the afternoon cleaning the car and afterward decided to drive it to my family's place in Silver Spring. Let's just say I gave the car a thorough shakedown. There's much more to do before I'm done in the engine bay, but a major upgrade has been crossed off my E30 wish list. First and foremost I'd like to thank Tim for all the time he put in even though his plate was full, Ian for helping with the de-install, Dave for poppin in and helping Tim that last Sunday afternoon, AAA Plus for the flatbed comp, my breh-in-law Nick for the rental help to keep my sanity during my 100+ mile daily commute and the guys at Euromotive for all the effort to help me get this accomplished. Here's a treat for all of you who read through this long-ass post:
The next thing on the list is a few check panel alerts and some connector replacements. A dyno baseline wouldn't be a bad idea either; I'd like to see if the stock management is keeping up air/fuel ratio-wise. Stay tuned.
Labels:
grease,
m20b28,
part 18,
the red coupe
Tuesday, May 10, 2011
The Red Coupe - More Power Pt.3
After the engine bay was cleaned, it got dirty. The car was sitting outside with the hood off and essential electronics covered, for the sporadic rainstorms that were off and on all week, so the bay was covered with pollen and helicopter seeds from all the Maple trees that surrounded the shop. This development ended up being the least of our problems. Since no work was performed over the work week due to other obligations and what not, we were in a crunch to keep this adventure from spilling into another week. I'd rented a car (thanks Nick) through this day of activity, but now I'd rely on my grey subframe scraper to get me from place to place which wore on me quickly due to the long commute from northern Maryland. Meanwhile I was trying to get the grey hatch to pass emissions, but that story can wait for another day.
Over the week I did more research and ordered a few parts from my friends at Euromotive. I needed a few items here and there that had broken over the years, plus once I learned that all of the coolant, fuel rail and harness stuff from my 89' motor would have to be swapped over, including my clutch fan, I decided to get a new metal impeller waterpump. Along with these developments the time this operation would take to perform grew quite a bit. One positive was when Tim dismantled the timing belt cover, distributor and wires; I remembered all the things the Andre (the seller) told me had gotten damaged and needed replacement; timing belt cover and distributor rotor (he provided me spares for those items). More trips to the part washer were needed to clean up the replacement parts and the parts that were going to be reused but came off during the process. Thankfully we didn't have to remove the timing belt or tensioner which made things easier since that would be another task on the every growing list of things to get done.
Since I was using a powdercoated intake manifold for this motor I acquired from Guten Parts, I had to swap a ton of items over from that as well. But due to motor differences, I would need plenty from my original motor as well. This process was a slow, meticulous grind. Between tasks, I took some electrical tape to exposed spaghetti in the engine harness and took a mental tally of all the wiring that would need to be cleaned up after this process was completed. I would need a few new connectors as well. 20 year old plastic is extremely brittle.
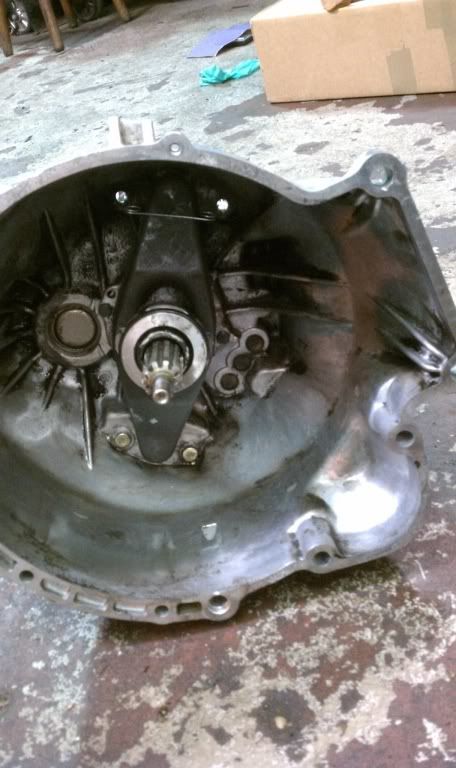
In order to make sure we got some major work done on this day of wrenching, Tim came up with a plan to keep us from getting stuck in a tar pit doing all the hundreds of small tasks that were needed, and instead get some big stuff out of the way which required a lift among other things. We decided to not finish completing the long block and instead get the transmission cleaned up, then install the new clutch and throwout bearing (a SPEC stage 2 Kevlar unit), new clutch fork and fork clip. A heavy duty brass pivot pin from Pelican Parts was a 13mm deep-socket tap-in affair. After 30 minutes of cycling Spray-9, brushing and hand powered pressure washing (see trans below), we were on to the air-pressure dryin', lithium greasin' and clutch installin'. I helped Tim bring the trans and block together like lamb and tuna fish, then we very carefully dropped the motor into the bay. Things were looking up.
Over the week I did more research and ordered a few parts from my friends at Euromotive. I needed a few items here and there that had broken over the years, plus once I learned that all of the coolant, fuel rail and harness stuff from my 89' motor would have to be swapped over, including my clutch fan, I decided to get a new metal impeller waterpump. Along with these developments the time this operation would take to perform grew quite a bit. One positive was when Tim dismantled the timing belt cover, distributor and wires; I remembered all the things the Andre (the seller) told me had gotten damaged and needed replacement; timing belt cover and distributor rotor (he provided me spares for those items). More trips to the part washer were needed to clean up the replacement parts and the parts that were going to be reused but came off during the process. Thankfully we didn't have to remove the timing belt or tensioner which made things easier since that would be another task on the every growing list of things to get done.
Since I was using a powdercoated intake manifold for this motor I acquired from Guten Parts, I had to swap a ton of items over from that as well. But due to motor differences, I would need plenty from my original motor as well. This process was a slow, meticulous grind. Between tasks, I took some electrical tape to exposed spaghetti in the engine harness and took a mental tally of all the wiring that would need to be cleaned up after this process was completed. I would need a few new connectors as well. 20 year old plastic is extremely brittle.
In order to make sure we got some major work done on this day of wrenching, Tim came up with a plan to keep us from getting stuck in a tar pit doing all the hundreds of small tasks that were needed, and instead get some big stuff out of the way which required a lift among other things. We decided to not finish completing the long block and instead get the transmission cleaned up, then install the new clutch and throwout bearing (a SPEC stage 2 Kevlar unit), new clutch fork and fork clip. A heavy duty brass pivot pin from Pelican Parts was a 13mm deep-socket tap-in affair. After 30 minutes of cycling Spray-9, brushing and hand powered pressure washing (see trans below), we were on to the air-pressure dryin', lithium greasin' and clutch installin'. I helped Tim bring the trans and block together like lamb and tuna fish, then we very carefully dropped the motor into the bay. Things were looking up.
Next up...all the little things we didn't get to.
Labels:
grease,
m20b28,
part 17,
the red coupe
Tuesday, May 3, 2011
The Red Coupe - More Power Pt.2
After what felt like a power nap, I rolled out of bed and back to the garage. On the list for today was some game planning, late research and cleaning the engine bay. First things first, it seems I didn't get every detail lined up as I should have when I acquired this new motor. While taking my original motor out the night before, I noticed that the engine harness connector had two more functional pins in it than the new motor's harness (from an 87' car). Upon further online research before getting to the garage, 325i motors from early 87' had a couple of differences from 89' 325i motors; no real differences mechanically, but mainly in what was run through the ECU. For the sake of keeping things working properly in my 89' car, this just means my original harness will need to be used on the new motor, as well as my ECU (which isn't chipped like the new ECU). This isn't terrible, it'll actually be interesting to see what this motor puts down with completely stock management. Lastly, in order to keep my coolant tank as is, my old coolant hoses will need to be swapped over.
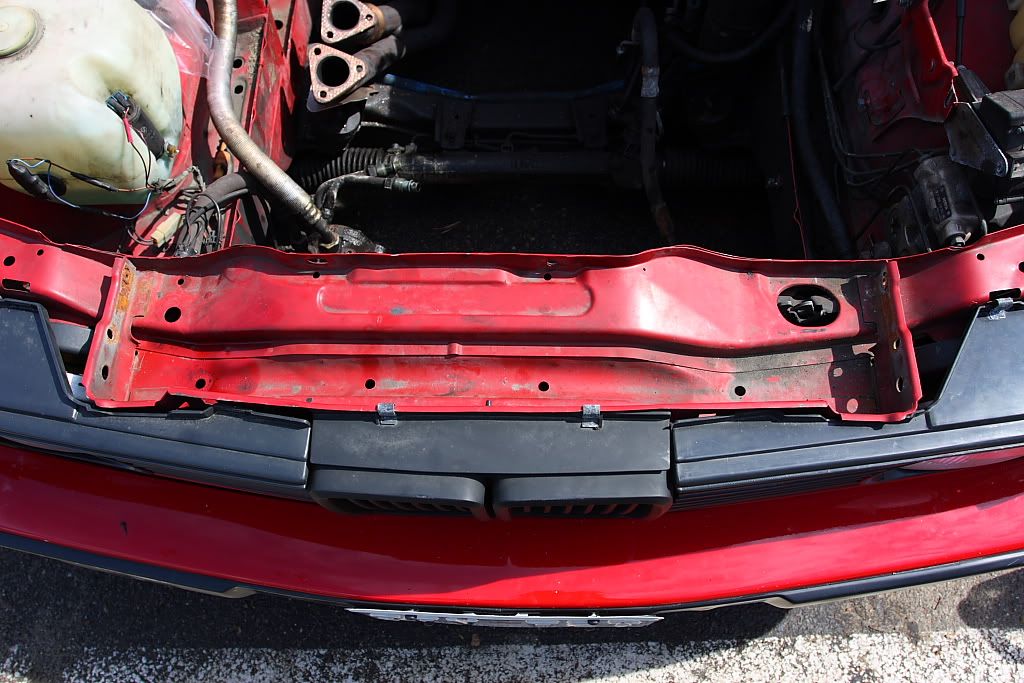
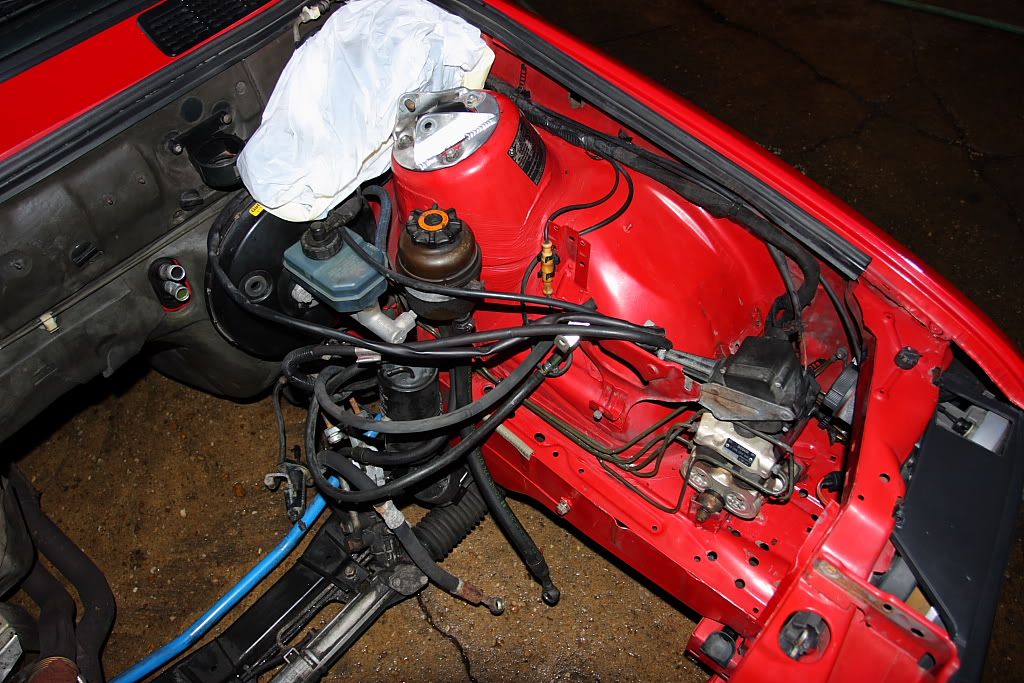
The first thing I tackled was cleaning the engine bay. I went through and covered up as many frayed wire connectors, as well as all the important electrical components, as I could. Then I removed the windshield washer and coolant reservoirs. I started off with soap and water for the upper areas, then followed up with multiple cycles of Spray 9 with a coarse brushing, then (hand powered) high pressure water blasting afterwards. This was a long, greasy, task which ended up taking the lions share of my time. Between old power steering fluid that has sludgified with road dirt and seeping seal run-off, there was a good coating of black everywhere you could think of. After surface cleaning was wrapped, I took my engine mount brackets to the parts cleaner then mocked them up in the bay with the new mounts. Here's a good ol' fashioned before and after of the results.
Before:
After:
Tim and I went to town with Griot's hand polish and 3M rubbing compound after drying the bay, and the results were pretty damn pleasing given the fact this was all original paint. Once all this was complete I attempted to get my powder-coated intake manifold and valve cover on the new motor. The intake manifold swap wasn't as easy a task as I imagined, so after thorough picture taking and removal of wiring and nuts, I stopped work after removing the intake manifold.
During this bay cleaning afternoon I took a running tally of parts that we would need going forward; all gaskets for the intake manifold, throttle body and thermostat housing. Lower snap in guides for the radiator. Upper radiator bracket, which was cracked but fully functional (a new one was only $5 bucks so why not). And a new snap on cover for that little box next to the fuse box that appears to be a diagnostic port, but isn't...I'll clarify during the next episode.
The first thing I tackled was cleaning the engine bay. I went through and covered up as many frayed wire connectors, as well as all the important electrical components, as I could. Then I removed the windshield washer and coolant reservoirs. I started off with soap and water for the upper areas, then followed up with multiple cycles of Spray 9 with a coarse brushing, then (hand powered) high pressure water blasting afterwards. This was a long, greasy, task which ended up taking the lions share of my time. Between old power steering fluid that has sludgified with road dirt and seeping seal run-off, there was a good coating of black everywhere you could think of. After surface cleaning was wrapped, I took my engine mount brackets to the parts cleaner then mocked them up in the bay with the new mounts. Here's a good ol' fashioned before and after of the results.
Before:
After:
Tim and I went to town with Griot's hand polish and 3M rubbing compound after drying the bay, and the results were pretty damn pleasing given the fact this was all original paint. Once all this was complete I attempted to get my powder-coated intake manifold and valve cover on the new motor. The intake manifold swap wasn't as easy a task as I imagined, so after thorough picture taking and removal of wiring and nuts, I stopped work after removing the intake manifold.
During this bay cleaning afternoon I took a running tally of parts that we would need going forward; all gaskets for the intake manifold, throttle body and thermostat housing. Lower snap in guides for the radiator. Upper radiator bracket, which was cracked but fully functional (a new one was only $5 bucks so why not). And a new snap on cover for that little box next to the fuse box that appears to be a diagnostic port, but isn't...I'll clarify during the next episode.
Labels:
grease,
m20b28,
part 16,
the red coupe
Tuesday, April 26, 2011
The Red Coupe - More Power Pt.1
Following up on the last episode, you'll know that I got my hands on a motor to replace old faithful. Before we get to that, I'll share the last afternoon I spent on this car with ya. I still had my winter setup installed, higher ride height, steelies with iPike w409s, sandblasted front is lip and rock chips a plenty. I still have rock chips ahoy, but I learned something very important; when you have perch type coils, they don't do such a great job shaking off the winter harshness and tend to seize quite easily. I spent 4 hours busting knuckles in the driveway finding this out, as all my older VW (non-perch) experiences never put me in this predicament. Long story short, my "temporary" height solution is growing on me; the car looks good with the new daily wheels and 205/50-15 BFG G-Force Sport tires (review coming this summer). I considered several wheel options and since I'm a sucker for building slick oem+ setups, factory 15x7" weaves went from a backup choice to the choice. This smaller wheel diameter and light weight has been an absolute joy to drive around in compared to what I had been running, and my suspension seems to be much happier than with the stock rolling diameter. My highway MPGs have gone up by about 2 (to ~30.5). The car is noticeably quicker too, which excites me for what's next.
Back on topic then. My motor is old (blah blah) and I have found a clean low-mileage rebuilt replacement. This past Friday was going to be the three day install weekend marathon, but things don't always work out as planned. Regardless, my buddy Tim (Rootbeer Tuning) who I've appointed the tech lead on this effort, and myself, have made it a point to make lemonade. The first thing needed to be done is pull the motor and detaching connectors, wiring and mounts was a major affair. Thankfully my buddy Ian was in town for Easter weekend and lent his hands towards the extraction. While this was being sorted out I cleaned every bracket that came from the car in the parts cleaner, scuffed up the new motor and painted the block in Eastwood Cast Iron color high temp engine paint. The exhaust manifolds were bush coated with Por-15 manifold paint. I didn't expect this to be perfect, but I did want things to be spruced up quite a bit over the sludge slathered heart that was in there already. It turned out great for my needs. While I was at it, I replaced the oil filter.
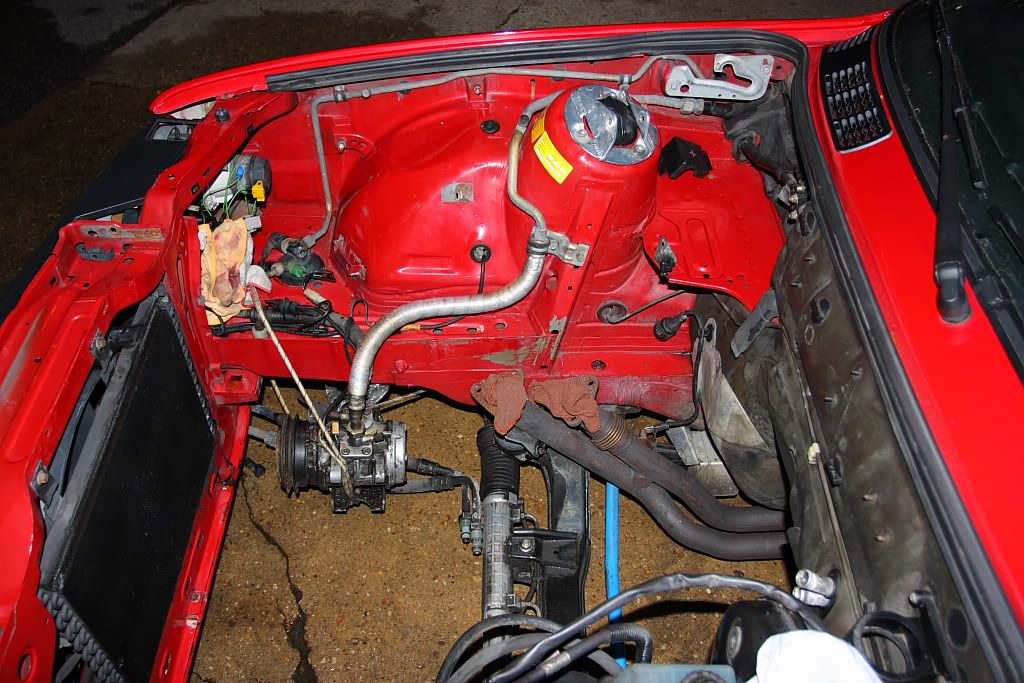
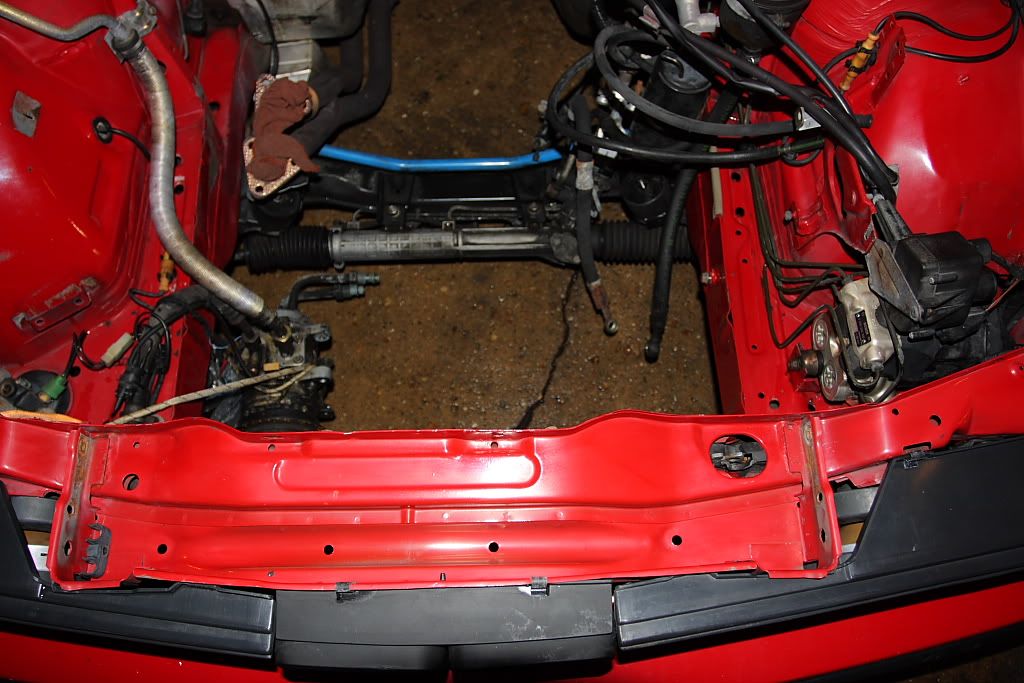
As we went along I made sure to take plenty of images to remember where everything went for the reinstall that will be taking place in a couple days. I wish I had a designated picture taker because shooting with my cell phone sucked; I would've used the good camera but I didn't want my grubby hands on that thing. When we got just about where we needed to be for removal after a ton a PITA clips (thanks Ian) and harness maneuvering, I began to see additional small things I wanted to fix before things went back together. This is the first engine swap that I've been completely invested in and didn't realize how easily the initial list of things to do grows beyond your initial estimates. I'll get into details on that next time around, but for the time being the first stage of this process was accomplished. Motor out.
There were some logistics that we didn't think of that threatened to throw a monkey wrench into the ease of this install. For the night though, it was time for some much needed sleep.
Back on topic then. My motor is old (blah blah) and I have found a clean low-mileage rebuilt replacement. This past Friday was going to be the three day install weekend marathon, but things don't always work out as planned. Regardless, my buddy Tim (Rootbeer Tuning) who I've appointed the tech lead on this effort, and myself, have made it a point to make lemonade. The first thing needed to be done is pull the motor and detaching connectors, wiring and mounts was a major affair. Thankfully my buddy Ian was in town for Easter weekend and lent his hands towards the extraction. While this was being sorted out I cleaned every bracket that came from the car in the parts cleaner, scuffed up the new motor and painted the block in Eastwood Cast Iron color high temp engine paint. The exhaust manifolds were bush coated with Por-15 manifold paint. I didn't expect this to be perfect, but I did want things to be spruced up quite a bit over the sludge slathered heart that was in there already. It turned out great for my needs. While I was at it, I replaced the oil filter.
There were some logistics that we didn't think of that threatened to throw a monkey wrench into the ease of this install. For the night though, it was time for some much needed sleep.
Labels:
e30,
grease,
m20b28,
part 15,
the red coupe
Subscribe to:
Posts (Atom)