


Over the week I did more research and ordered a few parts from my friends at Euromotive. I needed a few items here and there that had broken over the years, plus once I learned that all of the coolant, fuel rail and harness stuff from my 89' motor would have to be swapped over, including my clutch fan, I decided to get a new metal impeller waterpump. Along with these developments the time this operation would take to perform grew quite a bit. One positive was when Tim dismantled the timing belt cover, distributor and wires; I remembered all the things the Andre (the seller) told me had gotten damaged and needed replacement; timing belt cover and distributor rotor (he provided me spares for those items). More trips to the part washer were needed to clean up the replacement parts and the parts that were going to be reused but came off during the process. Thankfully we didn't have to remove the timing belt or tensioner which made things easier since that would be another task on the every growing list of things to get done.


Since I was using a powdercoated intake manifold for this motor I acquired from Guten Parts, I had to swap a ton of items over from that as well. But due to motor differences, I would need plenty from my original motor as well. This process was a slow, meticulous grind. Between tasks, I took some electrical tape to exposed spaghetti in the engine harness and took a mental tally of all the wiring that would need to be cleaned up after this process was completed. I would need a few new connectors as well. 20 year old plastic is extremely brittle.


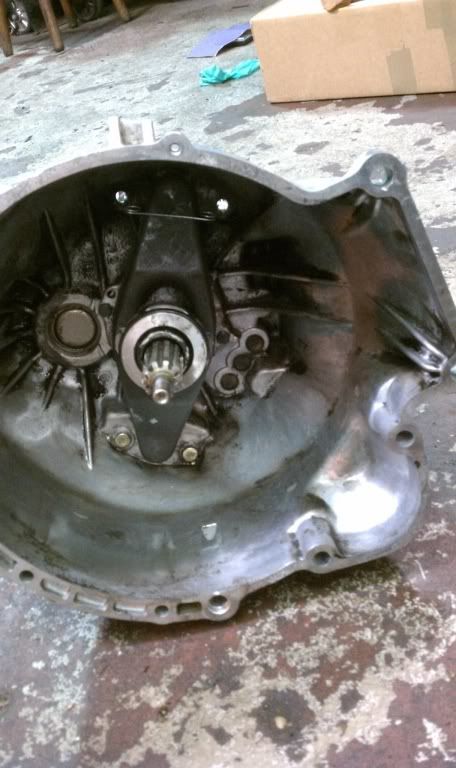
In order to make sure we got some major work done on this day of wrenching, Tim came up with a plan to keep us from getting stuck in a tar pit doing all the hundreds of small tasks that were needed, and instead get some big stuff out of the way which required a lift among other things. We decided to not finish completing the long block and instead get the transmission cleaned up, then install the new clutch and throwout bearing (a SPEC stage 2 Kevlar unit), new clutch fork and fork clip. A heavy duty brass pivot pin from Pelican Parts was a 13mm deep-socket tap-in affair. After 30 minutes of cycling Spray-9, brushing and hand powered pressure washing (see trans below), we were on to the air-pressure dryin', lithium greasin' and clutch installin'. I helped Tim bring the trans and block together like lamb and tuna fish, then we very carefully dropped the motor into the bay. Things were looking up.

Next up...all the little things we didn't get to.
No comments:
Post a Comment